The system is processing. Please wait a moment!


- Home page PRODUCT Hỗ Trợ Kỹ Thuật HỖ TRỢ KỸ THUẬT ÂM THANH

How to Use a Basic Mixer for Beginners
Status: Stocking
- Instructions for using the mixer for beginners
- Basic mixer operation
- How to fix mixer problems
- Safety instructions, parts and cleaning and maintenance instructions for the mixer
content
1. Safety instructions when using the mixer
- Read the instructions carefully before using the mixer.
- Unplug the mixer when not in use, before cleaning or changing connections.
- Avoid spilling liquid on the mixer to prevent electric shock or damage.
- Use the mixer indoors, avoid exposure to moisture.
- Supervise children when using the mixer to avoid accidents.
- Do not arbitrarily repair or change the structure of the mixer.
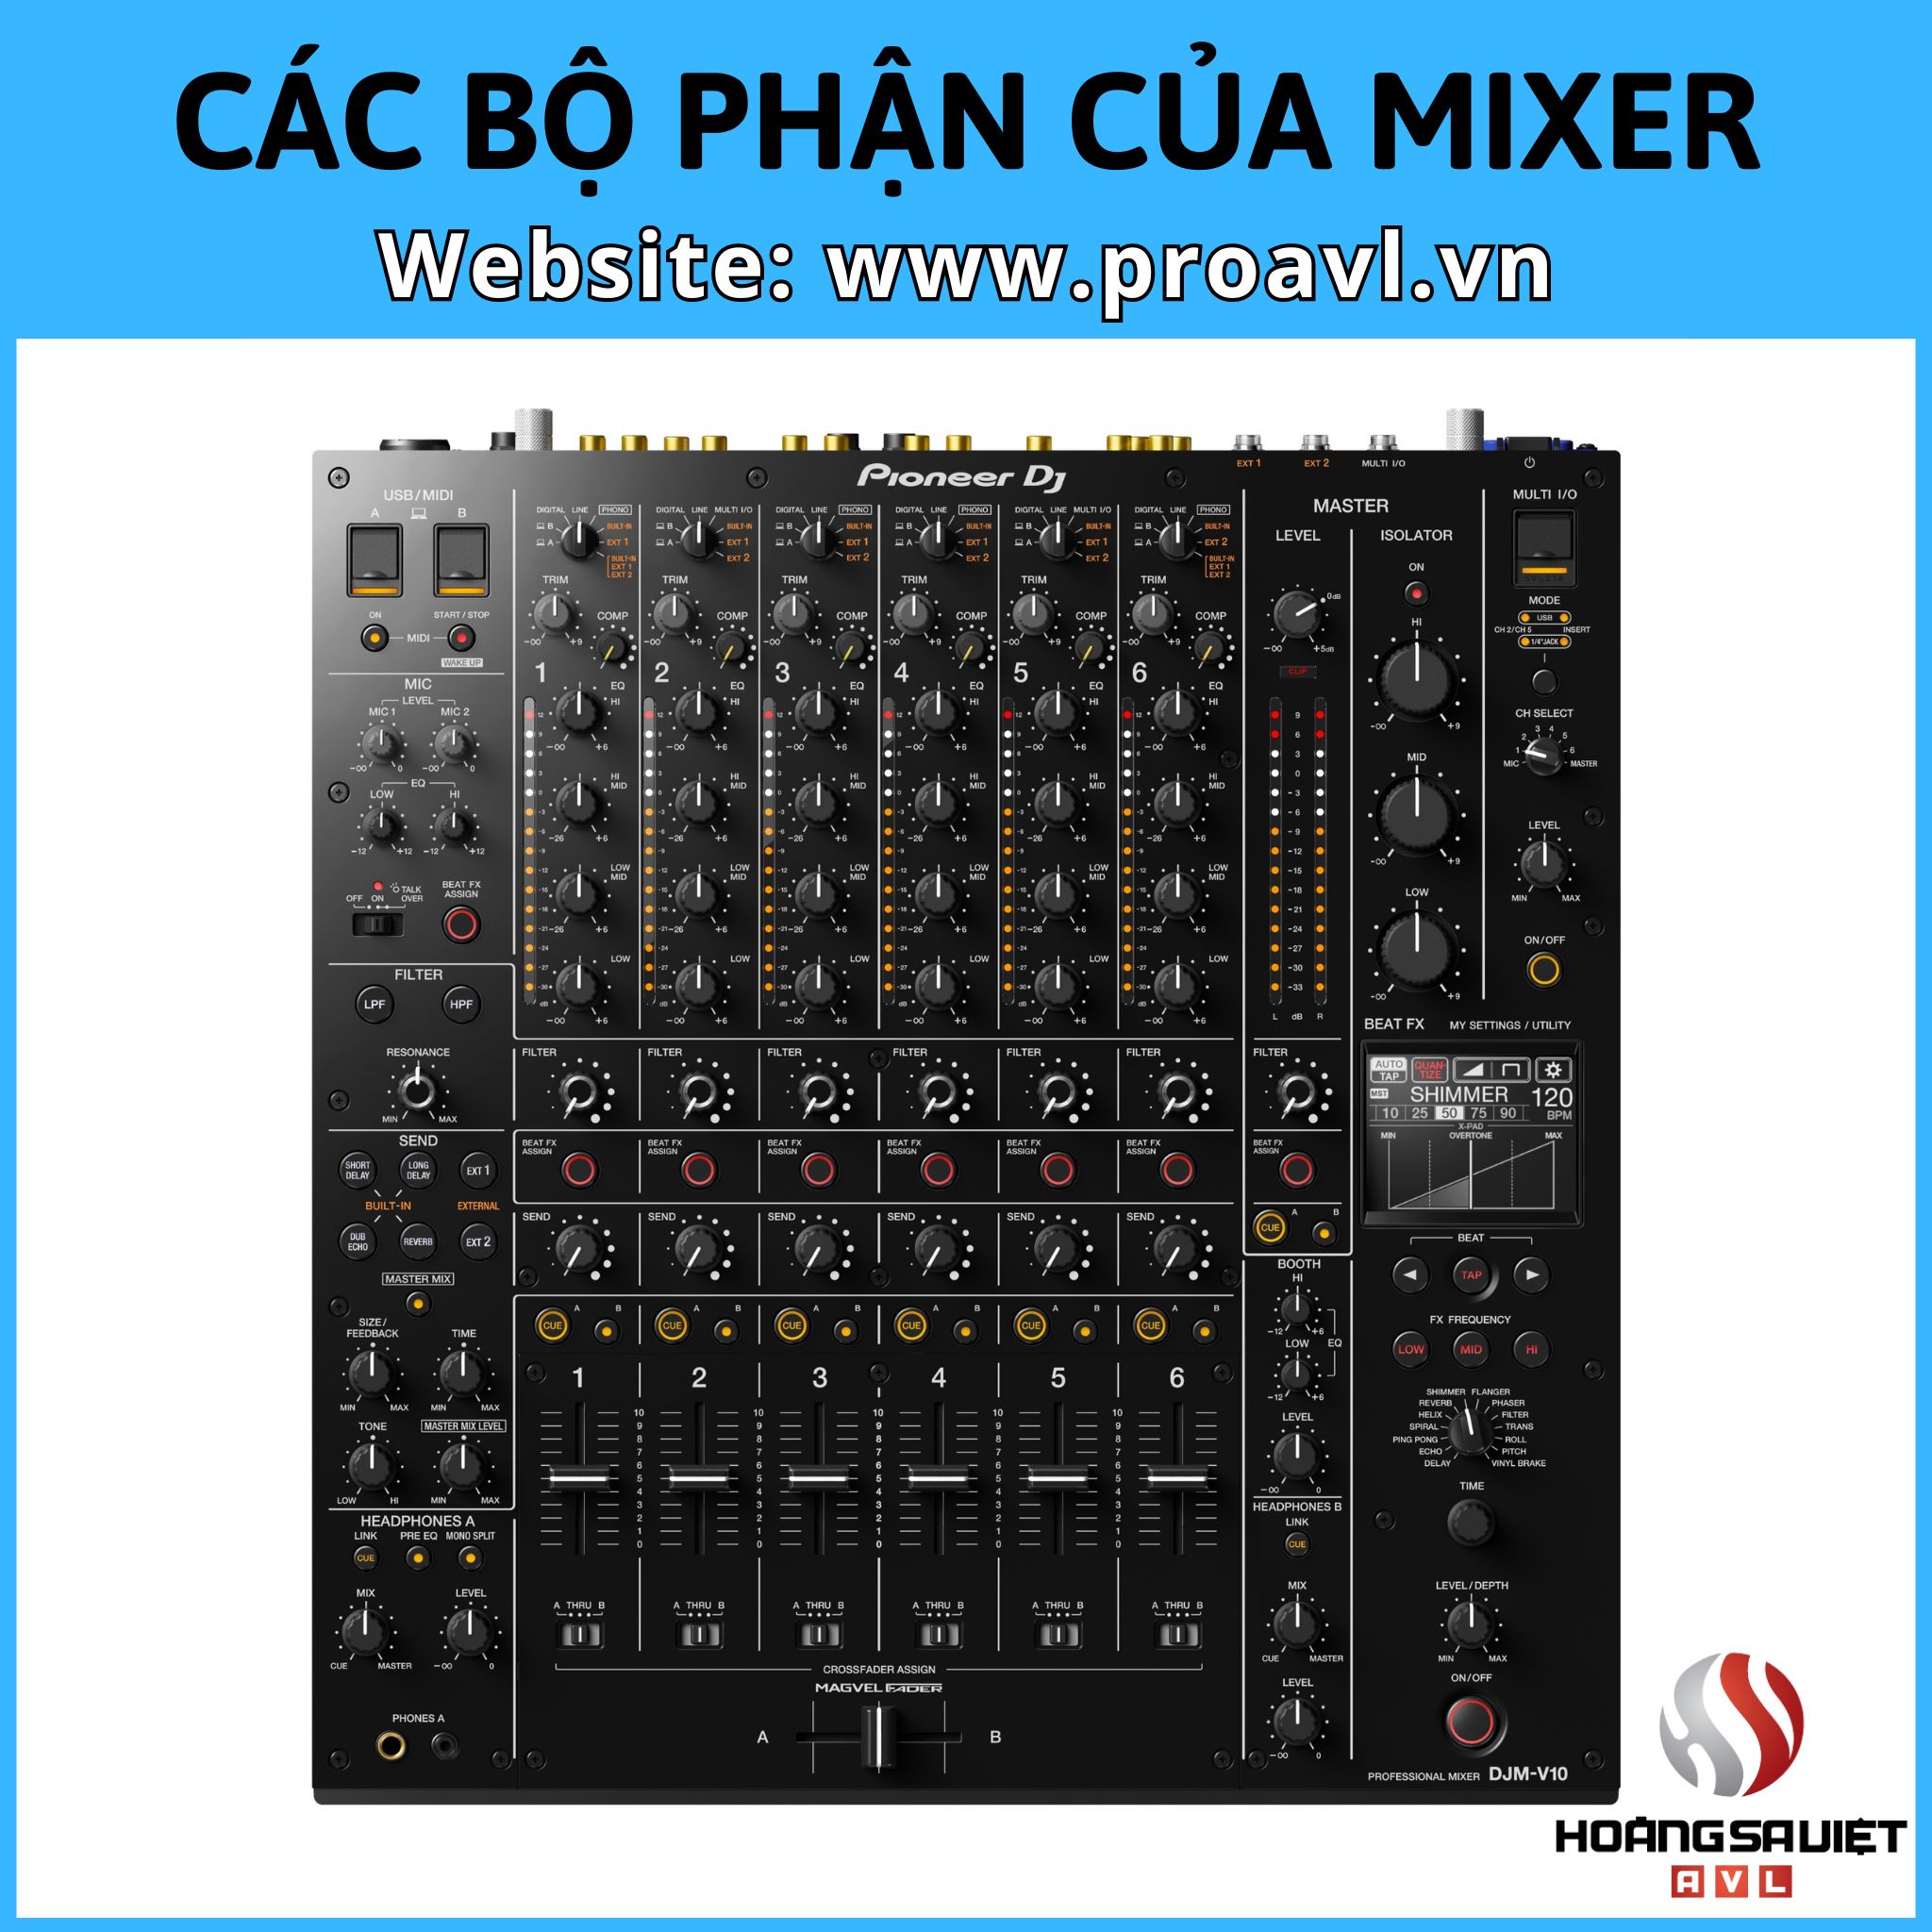
2. Mixer parts
- Input Jacks: Connect microphones, musical instruments or other sound sources.
- Output Jacks: Connect speakers, headphones or other audio output devices.
- Channel Strips: Includes input volume adjustment, audio balance (EQ), pan and fader.
- Master Section: Controls the overall volume, including the master fader, sound level meter and main output port.
- Auxiliary Sends/Returns: Used to connect external effects or monitoring.
- Power Switch: Turns the mixer on/off.
- Phantom power switch: Powers the condenser microphone.
3. Install the mixer
- Place the mixer on a flat surface, close to sound sources and output devices.
- Connect the microphone or instrument to the input port using the appropriate cables.
- Connect speakers or headphones to the output port.
- Plug the mixer into the power source.
- If using a condenser microphone, turn on the phantom power switch.
4. Operate the mixer
Power on the mixer by pressing the power switch.
4.1. Adjust GAIN on the mixer
On each channel of the mixer, you will easily notice the first adjustment knobs called Gain/Trim/Sens. These knobs play an important role in processing the input signal, helping you effectively eliminate noise and retain the main sound.
- Using:
Distinguishing noise and main sound: The first step is to determine what is noise and what is the main sound you want to record.
Eliminate noise: If the noise is weak, you can adjust the Gain/Trim/Sens knob to eliminate them. Turn the knob clockwise until the noise gradually reduces or disappears completely.
Adjust the main sound: Once you have eliminated noise, you can adjust the volume of the main sound by turning the Gain/Trim/Sens knob clockwise to increase or counterclockwise to decrease.
- Note:
The Gain/Trim/Sens knob has a different function than the volume knob. Volume simply adjusts the loudness of the sound, while Gain/Trim/Sens helps filter and remove noise, keeping the sound clearer and clearer.
SEE MORE PRODUCTS AND SERVICES OF HSV ProAVL
.jpg "Install sound and light")
.jpg "Install LED screen")
.jpg "Event Stage Rental")
.jpg "Event equipment")
4.2. Adjust EQ - Equalization on the mixer
EQ (Equalizer) is a knob cluster located right below the Gain/Trim/Sens knobs on the mixer, playing an important role in eliminating noise and fine-tuning the sound emitted from the mixer. However, using EQ effectively requires certain skills and understanding.
- User manual:
Start with flat EQ: As a first step, adjust the EQ to flat, meaning the knobs are centered. Then, the sound will not be distorted or cut off in any frequency range.
Adjusting the frequency range: Once you are familiar with the flat EQ adjustment, you can start adjusting the frequency ranges by moving the central bump of each knob. This adjustment helps you increase or decrease the intensity of specific frequency ranges, thereby controlling the sound in detail and fine-tuning the sound quality as desired.
- Note:
Adjusting the frequency range on EQ requires understanding of sound and skills in using the mixer. Therefore, if you are just starting out, practice with a flat EQ before moving on to adjusting the frequency range.
Each frequency range should be adjusted slowly and carefully, avoiding too sudden changes to ensure the sound is fine-tuned smoothly and naturally.
Listen carefully to the sound after each adjustment to gauge the effect and continue to fine-tune until the desired results are achieved.
.jpg)
4.3. Adjust the PAN on the mixer
PAN (Panorama) is a knob located on the Fader and behind the AUX on the mixer, playing an important role in adjusting the direction of sound emitted from the speaker. Using PAN effectively will help you create vivid sound effects and attract listeners.
- Using:
Understand the function: PAN works by adjusting the ratio of audio signals sent to the left and right speakers. When you turn the PAN knob to the left, more sound will flow to the left speaker and vice versa.
Adjusting the balance position: The center position (12 o'clock) of the PAN knob is considered the balance position, then the sound will be distributed evenly to both left and right speakers, creating a stereo sound effect. system.
Create sound effects: You can adjust the PAN to create rich and engaging sound effects. For example, move the PAN left to simulate the sound of a character moving from right to left, or move the PAN right to accent a specific instrument.
- Note:
Using PAN effectively depends on your intended use and your musical style. Experiment with different PAN positions to find the most suitable sound effect.
Use PAN sparingly to avoid unbalancing the sound in the mix.
Combine PAN with other audio adjustment tools such as EQ, Compressor to create complete and professional sound.
4.4. Auxiliary Outputs mixer
The peripheral connection port (Auxiliary Outputs) is an important part on the mixer, helping you connect the mixer to other peripheral devices such as effects, subwoofers, or recording. Using the external connection port effectively will help you expand your audio processing capabilities and create complete recordings.
- User manual:
Identify the channel: Start by identifying the channel you want to connect the peripheral to. Each channel on the mixer usually has a separate peripheral connection port.
Adjust Gain: After identifying the channel, adjust the Gain knob to increase or decrease the level of audio signal transmitted to the external connection port.
Calibrate EQ: Next, use EQ (Equalizer) to adjust the frequency range of the audio signal. This helps you control sound quality and eliminate unwanted noise.
Adjust the AUX knob: Finally, adjust the AUX knob corresponding to the channel to control the amount of audio signal sent to the external device. The AUX knob acts as a mixer, allowing you to adjust the ratio of the audio signal sent to the mixer and external devices.
- Note:
The order of performing the above steps may vary depending on the type of mixer and peripheral devices you use.
Refer to the user manual of the mixer and peripheral devices for detailed information on connection and use.
Gain, EQ and AUX knobs should be adjusted slowly and carefully to avoid damaging the sound or equipment.
SEE MORE PRODUCTS AND SERVICES OF HSV ProAVL
4.5. Use Fader, PFL and AFL, Pre/Post Fader Auxes on the mixer
* Instructions for using the mixer's Faders
- Pre Faders:
- Located on AUX channel.
- The signal does not go through the Fader when adjusting, so changing the Pre Fader value does not directly affect the device's output sound.
- Main function: Adjust the signal level sent to peripheral devices such as effects, subwoofers,... Balance the signal level between AUX channels.
- Post Faders:
- The signal goes through the Fader before being fed into the output.
- When adjusting the Post Fader on the AUX channel, the output sound will change according to the adjustment level.
- Main function: Adjust the overall volume level of the AUX channel. Create a "Send" effect to control audio sent to external devices.
- Note:
- On some high-end mixers, you can switch between Pre Fader and Post Fader for each AUX channel.
- Effective use of Pre Fader and Post Fader will help you control the sound in detail and create a complete mix.
- Tips for using Fader effectively:
- Determine the purpose of use: Clearly determine whether you want to adjust the Pre Fader or Post Fader to use the appropriate function.
- Adjust slowly: Start adjusting the Fader slowly to avoid sudden sound changes.
- Listen carefully: Always listen to the sound when adjusting the Fader to ensure the desired effect is achieved.
- Combine with other knobs: Use Fader in combination with other knobs such as Gain, EQ to optimize sound quality.
4.6. Volume and audio mixer
- Adjust volume level: Use the fader to adjust the volume of each channel and make sure the main fader is also adjusted to the correct level.
- Check the volume level: Use a sound level meter to make sure the signal is not clipping (distorted sound due to being too loud).
- Sound Test: Play or speak into each input source to check the volume level and adjust if necessary.

5. Clean and maintain the mixer
- Turn off the power to the mixer before cleaning.
- Wipe the surface clean with a dry or slightly damp cloth. Avoid using harsh detergents or solvents.
- Avoid dust and dirt: Use a cover when the mixer is not in use to avoid dust accumulation.
- Check cables regularly for damage and replace if necessary.
6. Troubleshoot mixer problems
- No sound: Check all connections, make sure the mixer is on, and check the volume level on the fader.
- Distorted audio: Reduce gain or volume level to avoid clipping.
- Buzzing or noisy sound: Check for grounding problems, damaged cables or interference from other electronic devices.
- One channel is not working: Make sure the pan control is centered and the fader is pulled up, check connection.
7. Tips for using the mixer effectively
- Use high quality cables: Reduce noise and improve sound quality.
- Label channels: Clearly label each channel to easily manage inputs.
- Sound check: Always check your sound thoroughly before performing or recording.
- Adjust gain appropriately: Make sure each stage of the signal path has the appropriate gain level to avoid noise and distortion.
- Use EQ wisely: Make gentle adjustments to avoid unnatural sounds and prevent feedback.
8. Contact information for HSV ProAVL
Hanoi: 0972.787.123
Ho Chi Minh City: 0913.222.075
Email: hsvavl@gmail.com
Website: http://proavl.vn/
Hanoi headquarters: No. 229, D. Van Tri, Van Noi ward, Dong Anh district, Hanoi
City headquarters. HCM: 184/20 Le Dinh Can, Tan Tao Ward, Binh Tan District, City. HCM
Hiện chưa có đánh giá nào về sản phẩm này!


")
- Trụ sở Hà Nội: 229, Đ. Vân Trì, Phường Vân Nội, Quận Đông Anh, Hà Nội
- Trụ sở TP. HCM: 184/20, Lê Đình Cẩn, Phường Tân Tạo, Quận Bình Tân, TP. HCM
- CN Phú Quốc: ĐT45, Dương Đông, Phú Quốc
- Nhà Máy Sản Xuất: Lê Minh Xuân, Bình Chánh, TP. HCM
- CÔNG TY CỔ PHẦN THIẾT BỊ SỰ KIỆN PRO AVL
- Số tài khoản: 112003034161
- Ngân hàng: Vietinbank
- Chi nhánh: Chợ Lớn - PGD BÌNH TÂN
![]()
-
Hotline: 0978.345.727
- Email: hsvavl@gmail.com
- Website: https://proavl.vn/
- Mã số thuế: 0319289763
- TUYỂN DỤNG NHÂN SỰ
© Copyright 2022. Copyright belong to HSV ProAVL